Notifications Center
Configure notifications for your Workspace.
Overview
The Notifications Center of the new notifications feature allows administrators to easily configure how users of the workspace are able to be notified about updates on the workspace.
The Notifications Center allows administrators to configure how the users of a workspace will receive notifications:
- It allows to completely disable all notifications or certain channels
- It allows to mute notifications triggered due to changes by technical users
- It allows configuring, which topics users of the workspace may receive
- By completely disabling certain topics
- By enforcing certain topics to be received by all users
- By limiting certain topics to only have some of the available options (never, instantly, daily, weekly)
- It allows to setup & test of custom configuration for the E-Mail channel
- Workspace branding to be used for the default header & footer
- Custom header & footer (HTML)
- Custom SMTP server
- It allows to setup & test of custom configuration for the Microsoft Teams channel
- Setup Bot & Microsoft Teams tenant ID
- It offers an Audit Log that allows seeing which notifications have been sent recently
Start Page
The start page of the Notification Center can be opened via the “Administration” menu as a dedicated section below “Advanced Settings”.
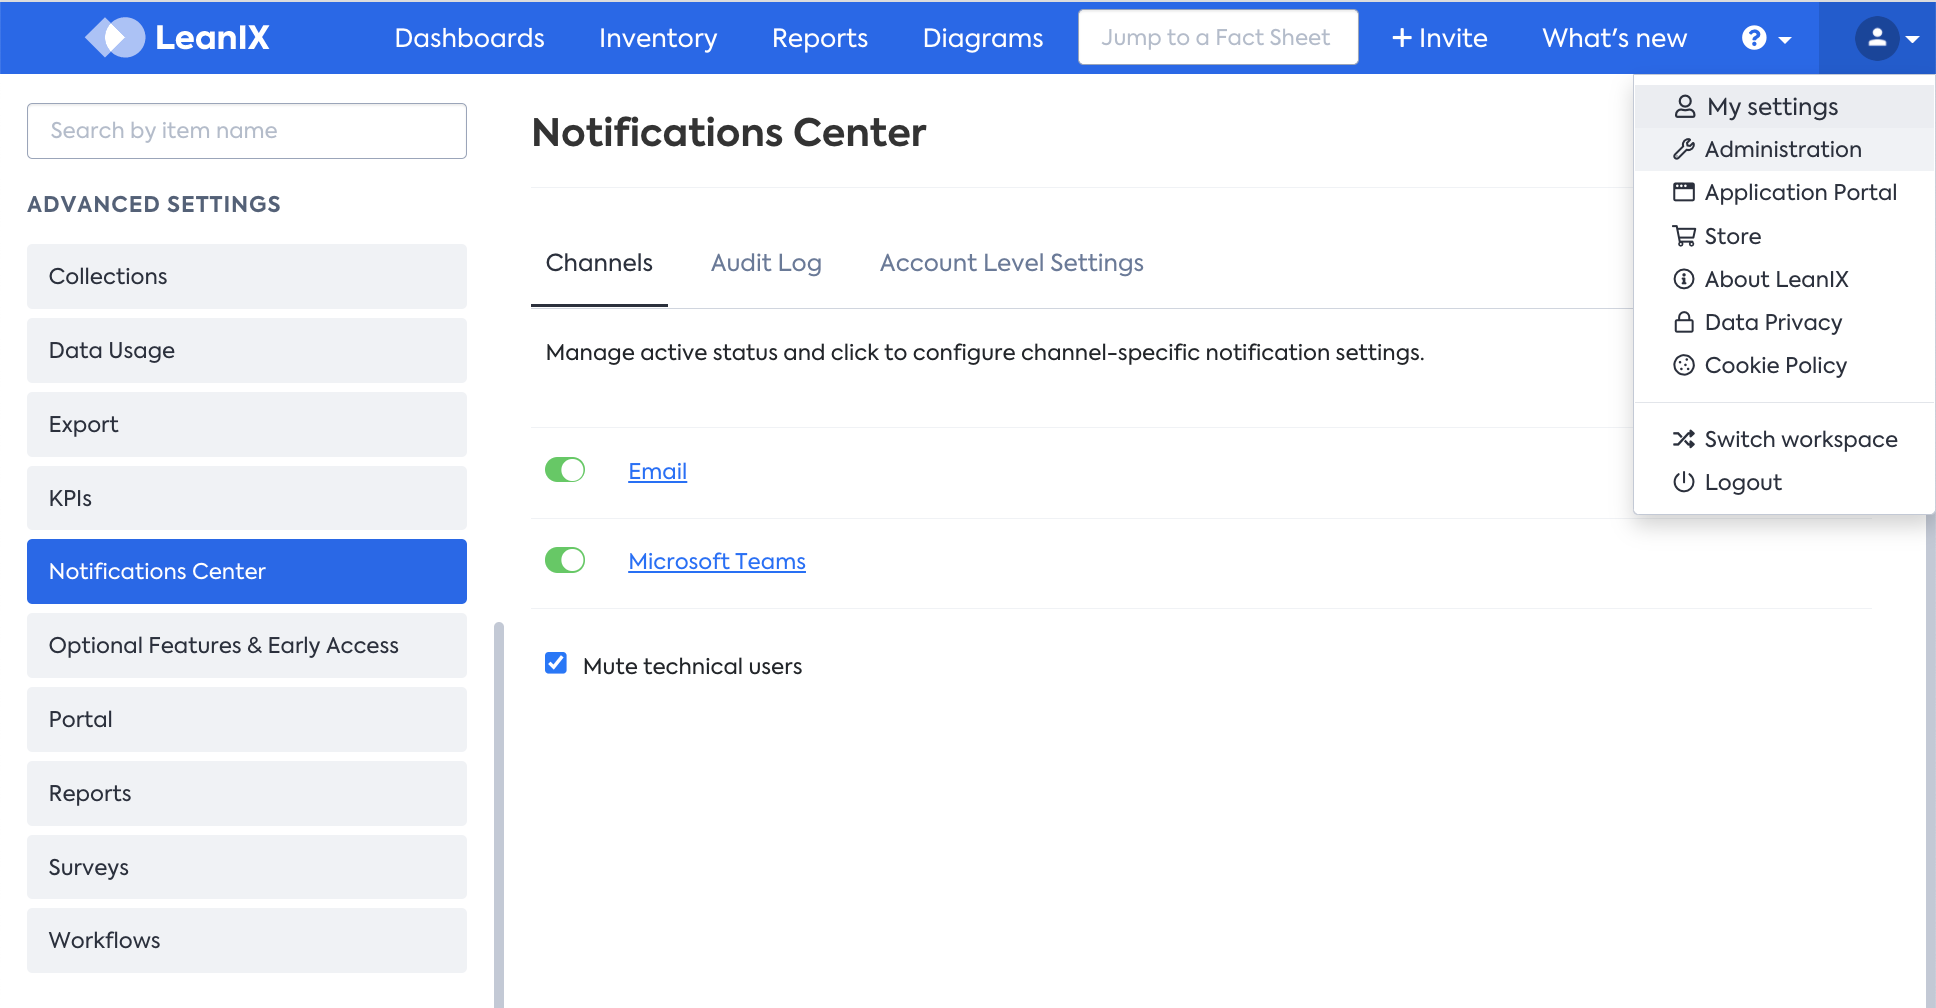
Start page of the Notifications Center
The start page allows to easily enable/disable complete channels (e.g. E-Mail) and to mute any notification that was triggered by a change of a technical user (e.g. an integration).
From the start page, you can also switch to configuring one of the channels by clicking it or locking into the Audit Log or Account Level Settings.
Configuring the E-Mail Channel
If you choose to configure the E-Mail Channel, you will see three new tabs: Workspace Notifications, Account Email Template, and Account SMTP Configuration.
Workspace Notifications
The Workspace Notifications tab allows you to see different domains & topics that you can subscribe to on a certain workspace. Any change done on this screen will only affect the workspace you are currently in.
The administrator can configure for each topic, which options the users of the workspace can choose from for the Frequency of the notification (Never, Instant, Daily, Weekly) and which of these options should be the Default for new users that did not choose one explicitly.
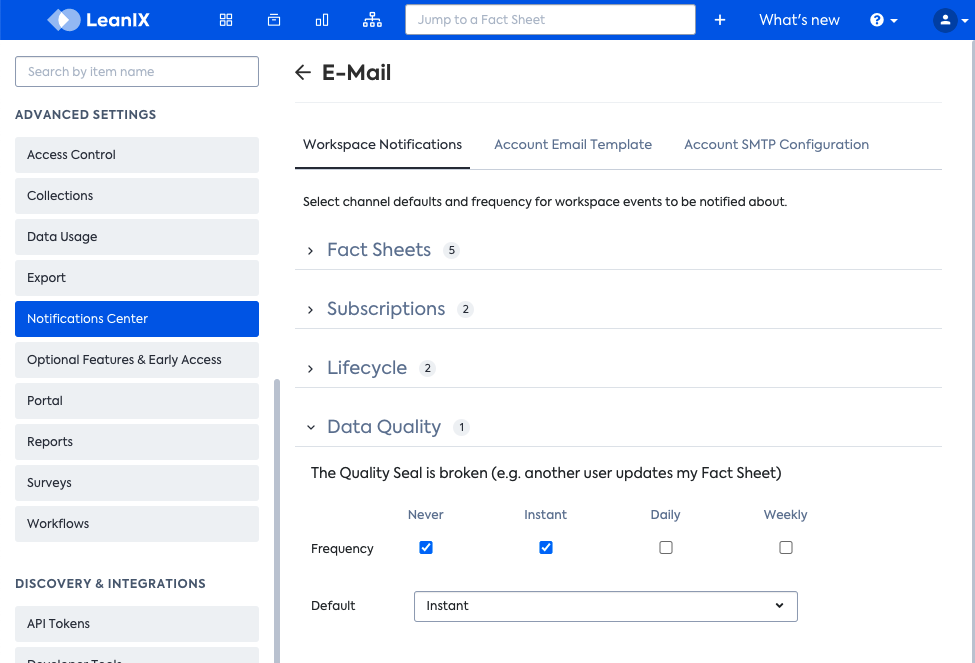
By disabling all options but Never, the administrator can completely disable a topic. Similarly, they can enforce notifications for specific topics by only choosing the option Instant.
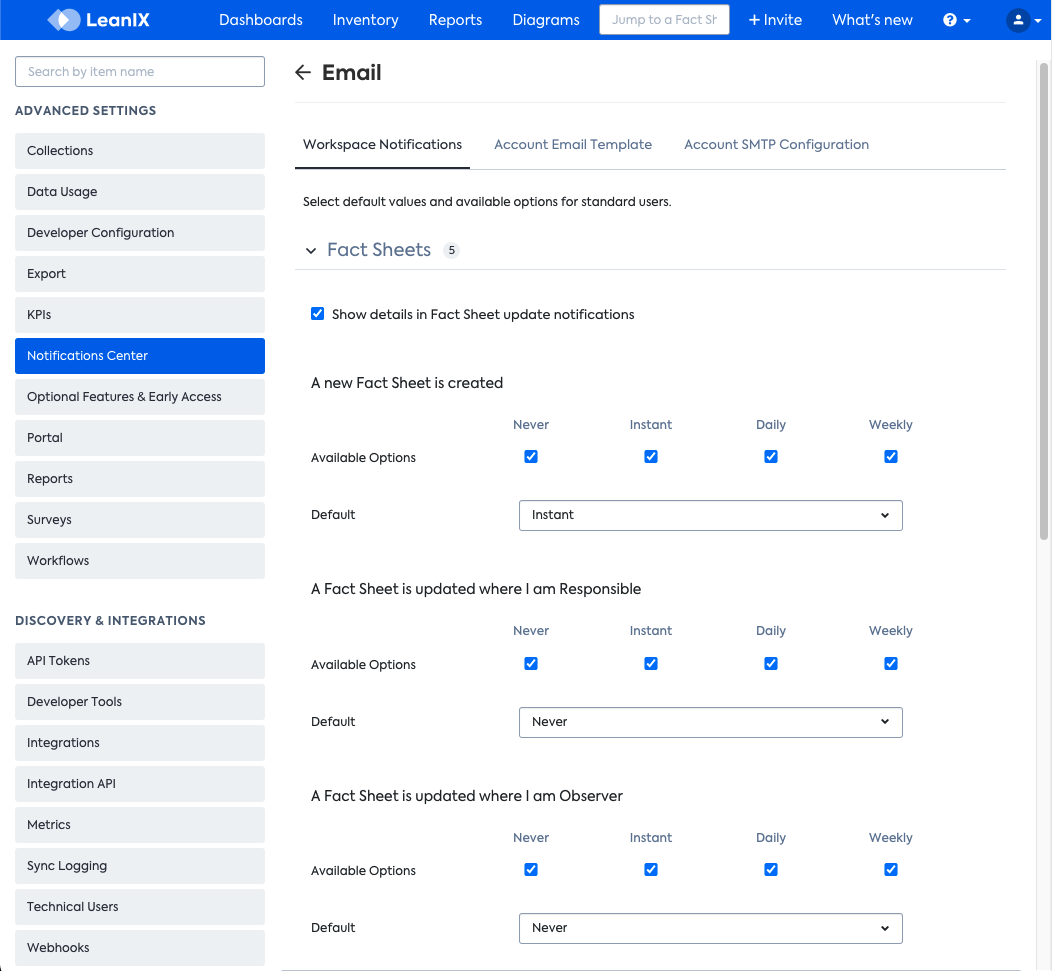
Fact Sheet Update Details
Under the Fact Sheets topic, you will be able to opt-in for showing details in Fact Sheet update notifications. Once this is enabled, the users of your workspace that have subscribed to Fact Sheet updated notifications on Email will see which field has changed on the Fact Sheet and the content of what has changed.
Account Email Template
The Account Email Template tab allows configuring the look of the E-Mails sent out by the system. Any change on this page will affect all workspaces of the account the user is currently logged into.

First of all, the administrator can define, which workspace is used to load the design for notifications that are not bound to a specific workspace (e.g. password reset notifications) and how images are to be displayed. Be aware that changes to the actual workspace design may take up to 24 hours to be reflected in the notifications.
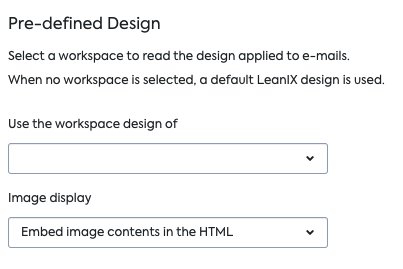
The administrator can also choose to use a completely custom HTML header & footer.
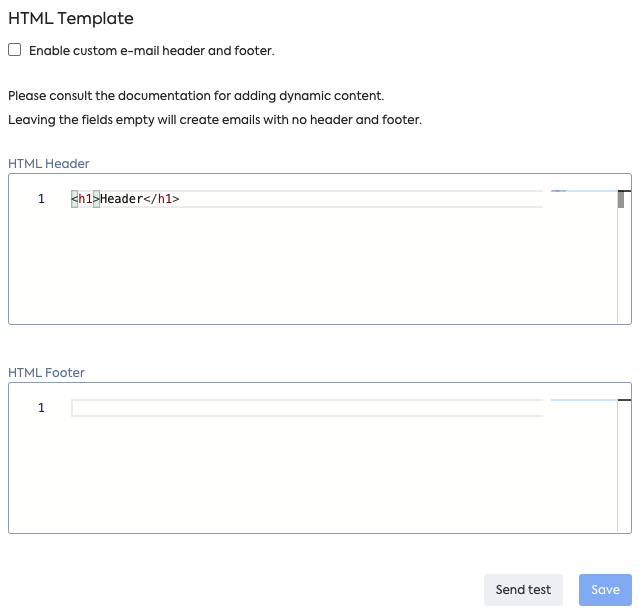
The following placeholders can be used inside of these templates:
{{recipient}}The display name of the recipient (e.g. first name and last name){{email}}The email address of the recipient
Account SMTP Configuration
The Account SMTP configuration tab allows configuring a custom SMTP server. Again, any change on this tab will affect all workspaces of the account the user is currently logged into.

The administrator can configure and test a custom SMTP server with the following values:
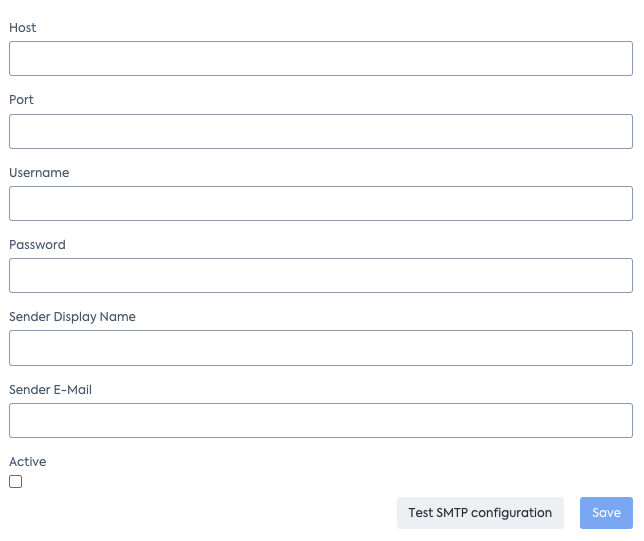
Authentication Information
Currently, the SMTP feature only supports Basic Authentication.
Note for users of an Office 365 mail server.
Ensure that you have activated authenticated client SMTP submission in your Microsoft 365 admin center. For more information, please refer to Enable or disable SMTP AUTH in Exchange Online.
Blocked Email Addresses
Information
This section does not apply if you have an active Account SMTP Configuration
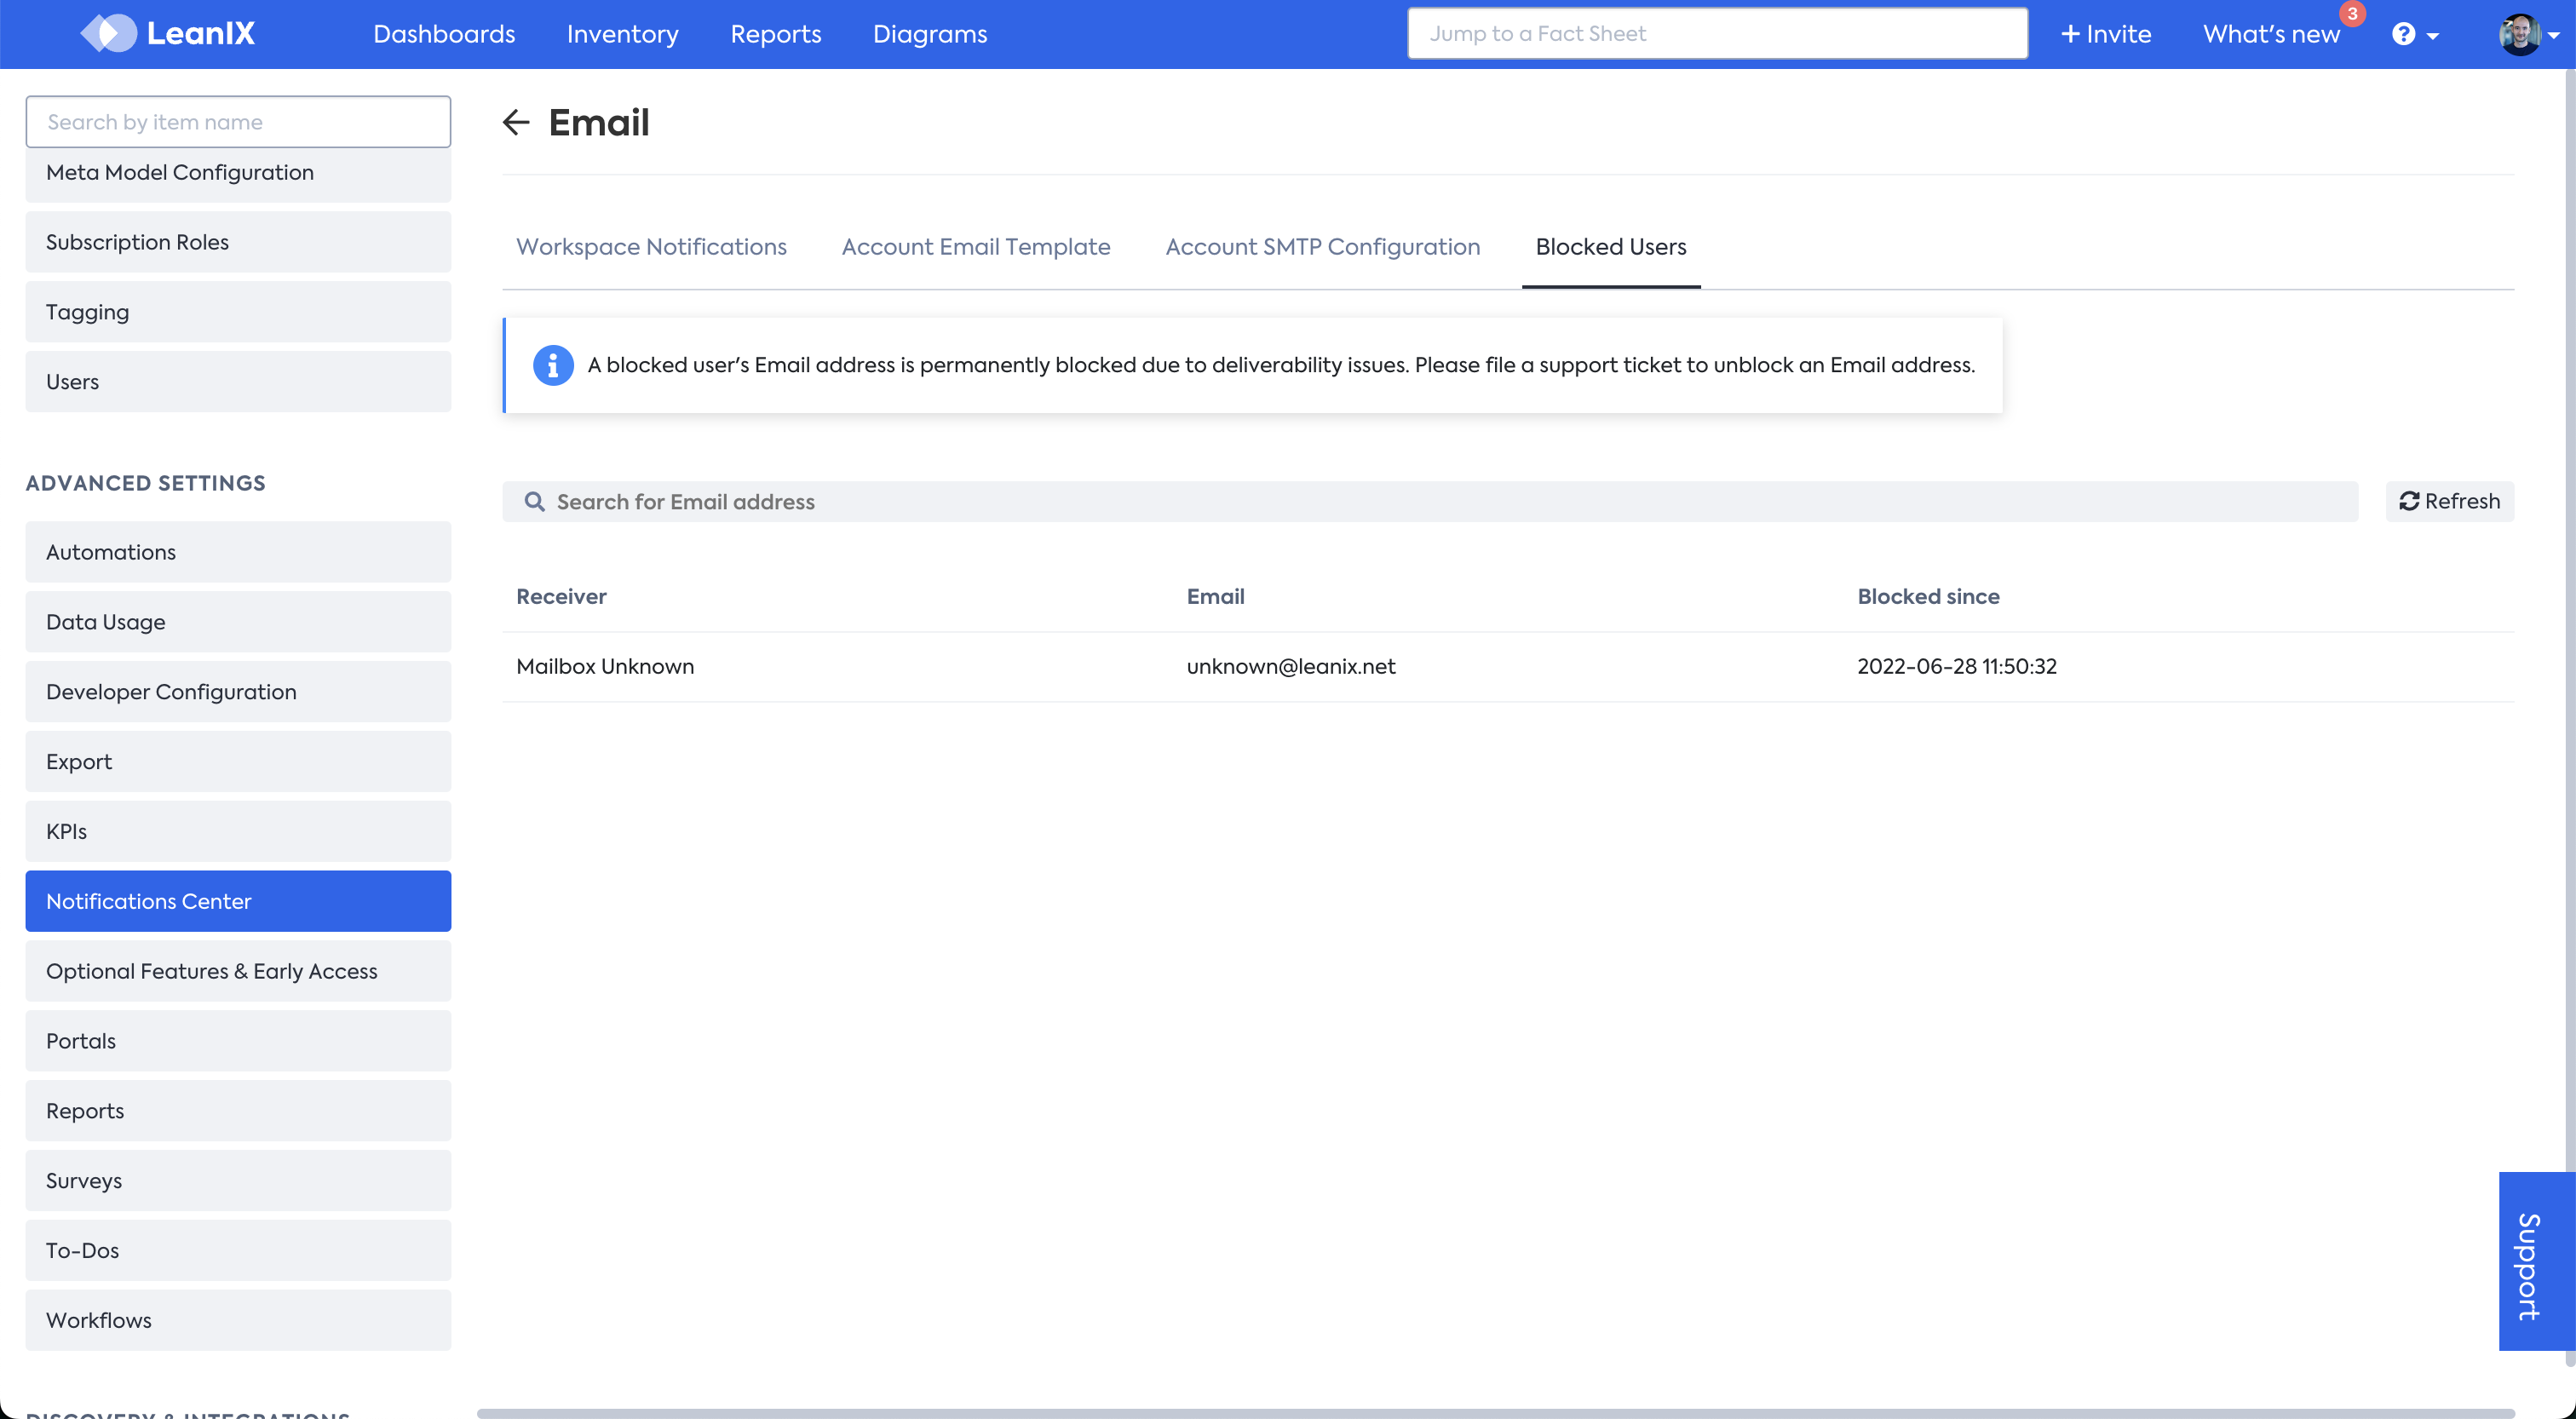
The Blocked Users tab allows you to identify which email addresses are currently on the blocked list. This list is maintained to protect our email sender's reputation. If an email delivery failed with a permanent error (e.g. a mistyped / non-existent email, a non-existent destination server), the email address will be blocked. Trying to send emails to addresses that are known to result in an error, hurts our mail reputation, which can lead to Emails being classified as spam by the mail server.
If you find an email address on the block list, which you know to be working and want to remove it from the list, please contact our support.
Configuring the Microsoft Teams Channel
If you choose to configure the Microsoft Teams channel, you will see three new tabs: Workspace Notifications and Account Microsoft Teams Configuration and Teams Users.
Workspace Notifications
The Workspace Notifications tab allows you to see different domains & topics that you can subscribe to on a certain workspace. Any change done on this screen will only affect the workspace you are currently in.
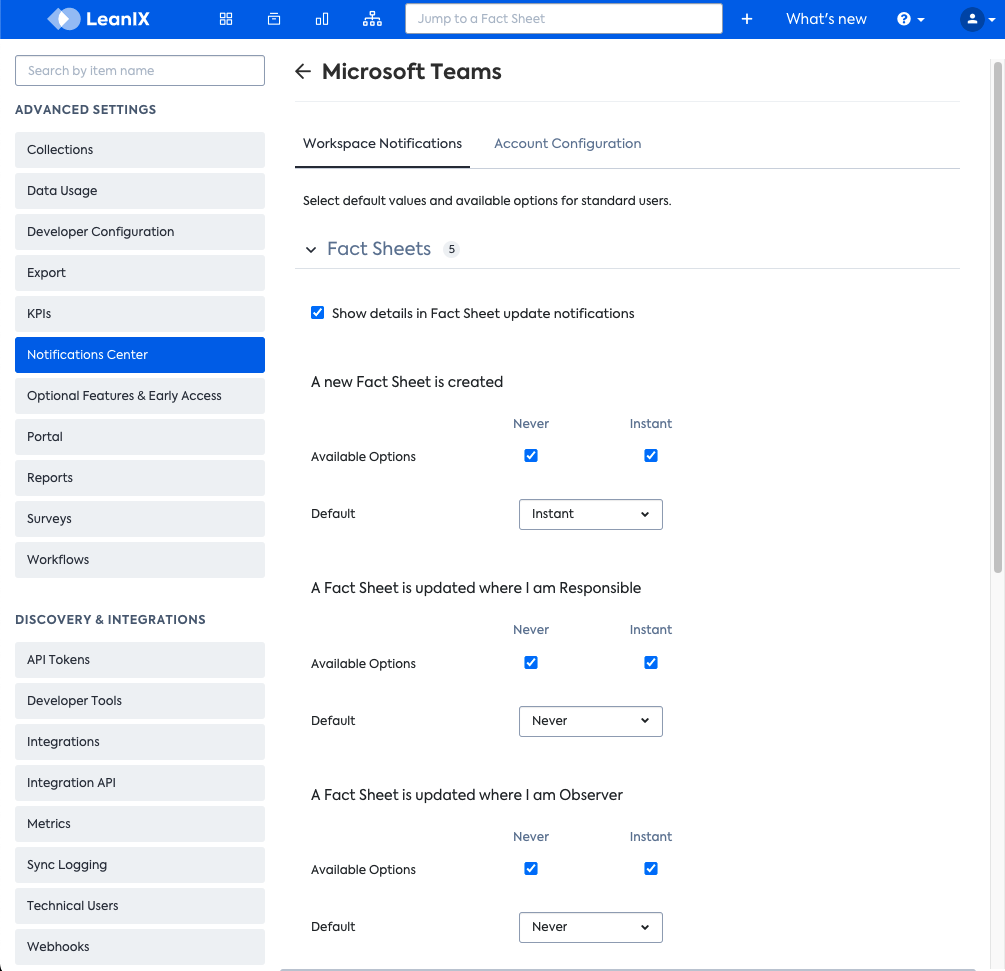
The administrator can configure for each topic which options the users of the workspace can choose from for the Frequency of the notification (Never, Instant) and which of these options should be the Default for new users that did not choose one explicitly.
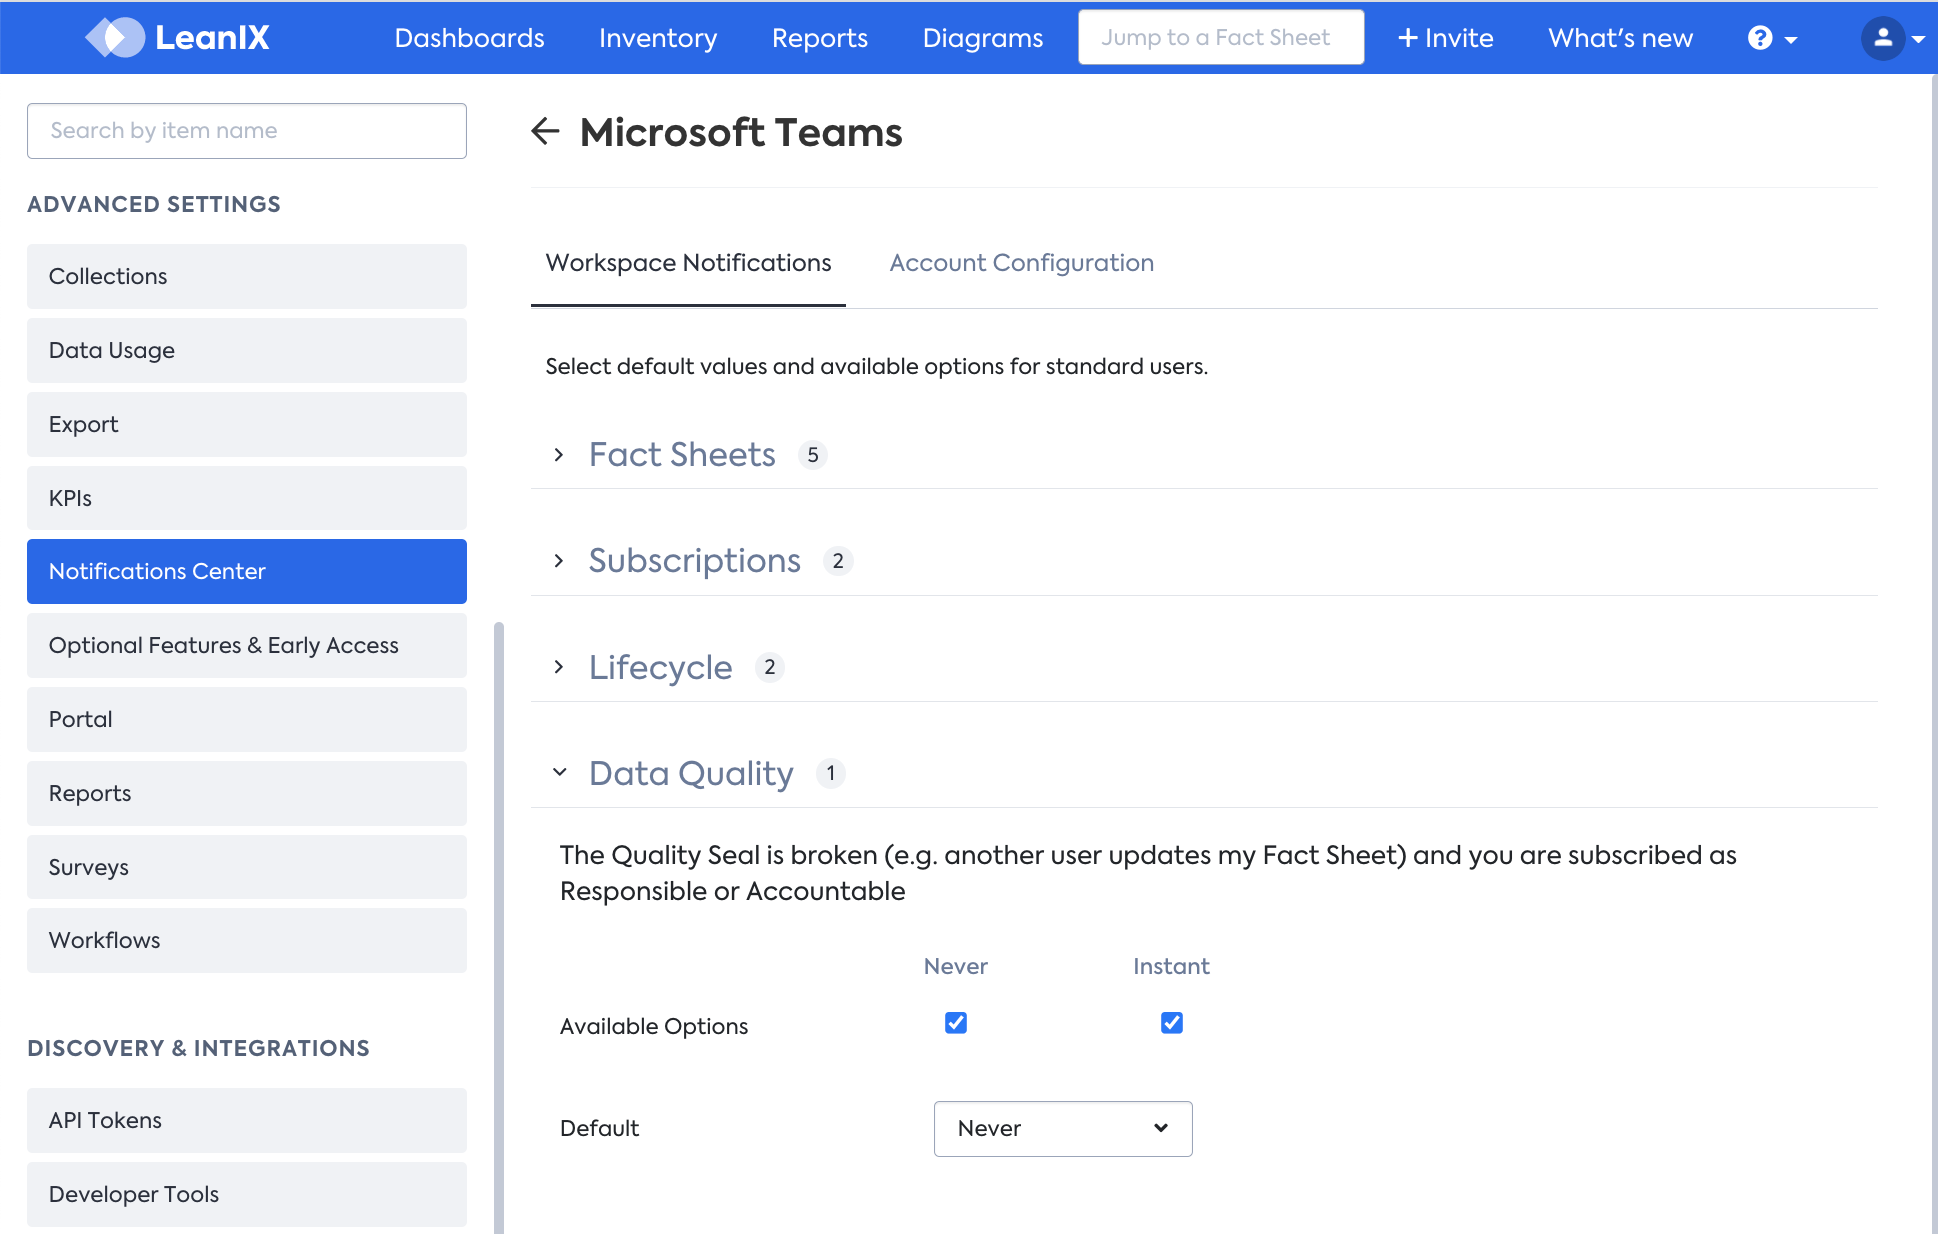
By disabling all options but Never, the administrator can completely disable a topic. Similarly, the administrator can enforce notifications for certain topics by only choosing the option Instant.
Fact Sheet Update Details
Equivalent to the Email channel you will be able to opt-in for showing details in Fact Sheet update notifications on Microsoft Teams. Once this is enabled, the users of your workspace that have subscribed to Fact Sheet updated notifications on Microsoft Teams will see which field has changed on the Fact Sheet, as well as the content of what has changed.
Audit Log
To view event logs for notifications, navigate to the Audit Log tab on the Notifications Center page. The log includes entries for the last 14 days.
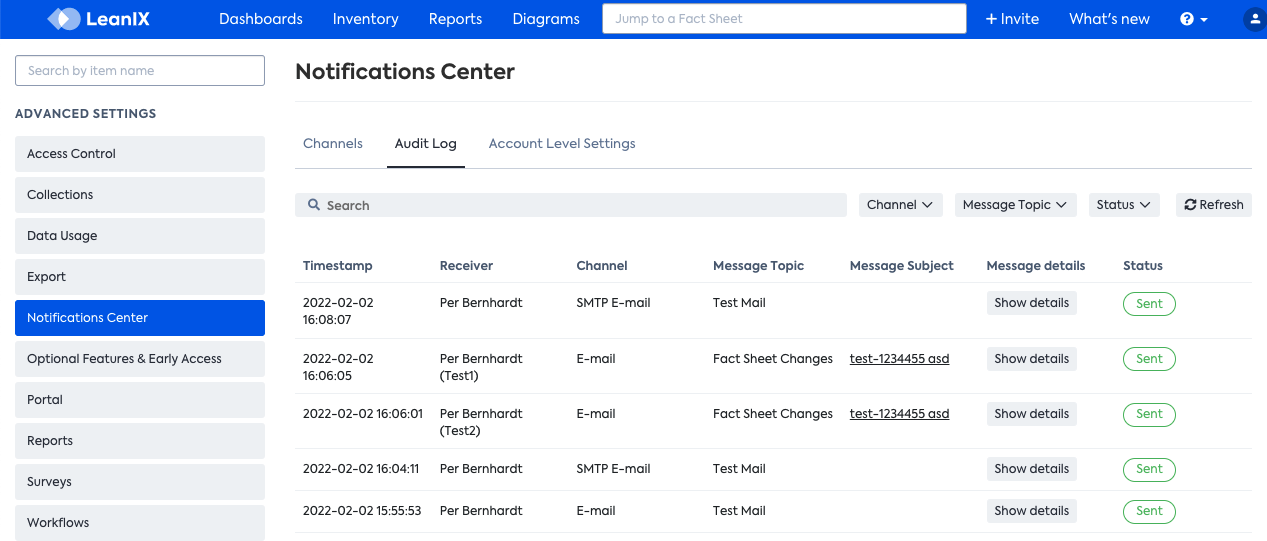
The following table contains a list of possible notification statuses for specific delivery channels.
| Status | Channel | Description |
|---|---|---|
| Bot disabled by admin | Microsoft Teams | The admin of the LeanIX Microsoft Teams app blocked the app for all users. |
| Chat blocked by user | Microsoft Teams | The user blocked the chat for the LeanIX Microsoft Teams app. |
| Considered spam | As reported by our email provider, the email was considered spam. | |
| Deferred | The delivery of the email was temporarily delayed by the LeanIX email provider. This could happen for various reasons, such as the system endpoint being unavailable or the recipient's server being busy. | |
| Failed | This status is assigned in the following cases: - As reported by our email provider, the delivery attempt was unsuccessful. In the case of a direct SMTP connection, an error was returned by the SMTP server. - If we have not received any final status from our email provider after a period of 24 hours, the message initially marked as Sending is automatically updated to Failed. | |
| Failed | Microsoft Teams | The message delivery failed due to an error. |
| Pending | - Email - Microsoft Teams | The message is scheduled to be sent. |
| Sending | The email was transferred to the LeanIX email provider for delivery, but we have not yet received a confirmation regarding the successful delivery of the email to the recipient. It's possible that the email was already delivered to the recipient, but the updated status is not visible through our email provider. | |
| Sent | As reported by our email provider, the email was successfully delivered to the recipient. In the case of a direct SMTP connection, this status means that we received a successful response from the SMTP server confirming the delivery. | |
| Sent | Microsoft Teams | The message was successfully sent through the Microsoft Teams API. |
| Unknown | - Email - Microsoft Teams | The information about the delivery status of the message is unavailable. |
Account Level Settings
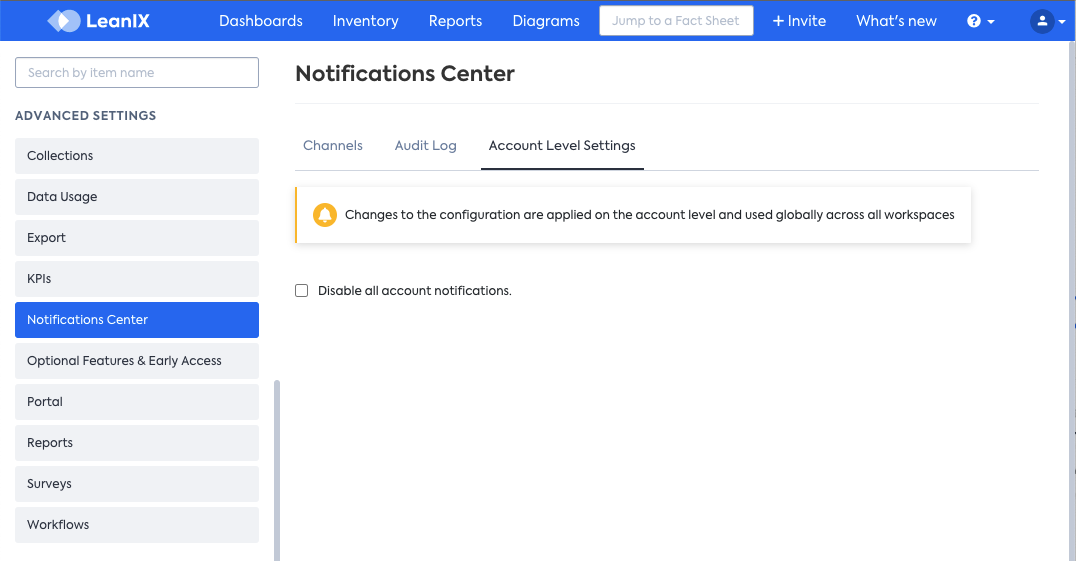
The administrator may also configure the notifications on an account level, e.g., by disabling them completely.
Updated 29 days ago
