SCIM Setup in Entra ID
This page offers information on how to set up and configure SCIM in your Entra ID environment for seamless identity management.
Step 1: Retrieve the Bearer Token
For general guidance on configuring SCIM and retrieving short-term and long-term bearer tokens, see Steps to set up SCIM. After completing those steps, proceed to the next section, which provides detailed instructions for configuring your Entra ID environment for provisioning
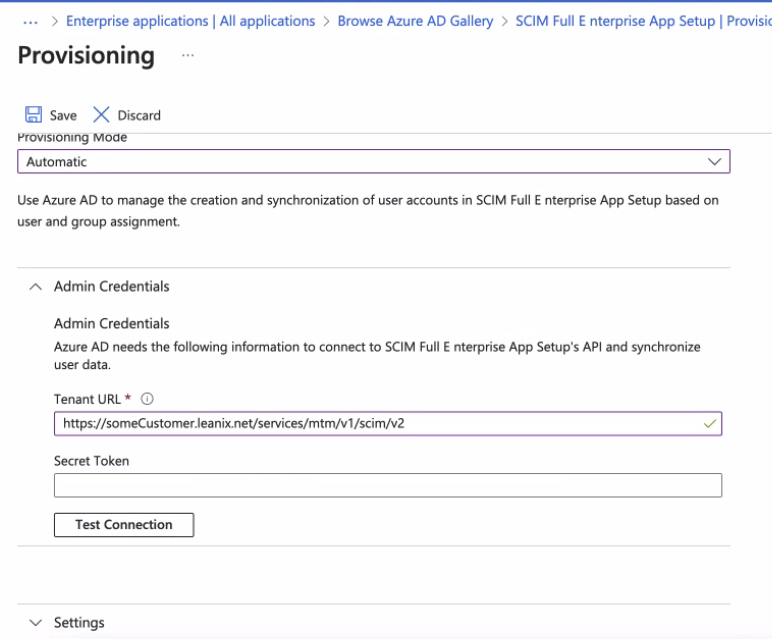
Step 2: Configure Provisioning in Entra ID
- Set Provisioning Mode to Automatic and under Admin Credentials add the following Tenant URL: https://<CustomerDomain>.leanix.net/services/mtm/v1/scim/v2 and Secret Token would be your Long-lived bearer token
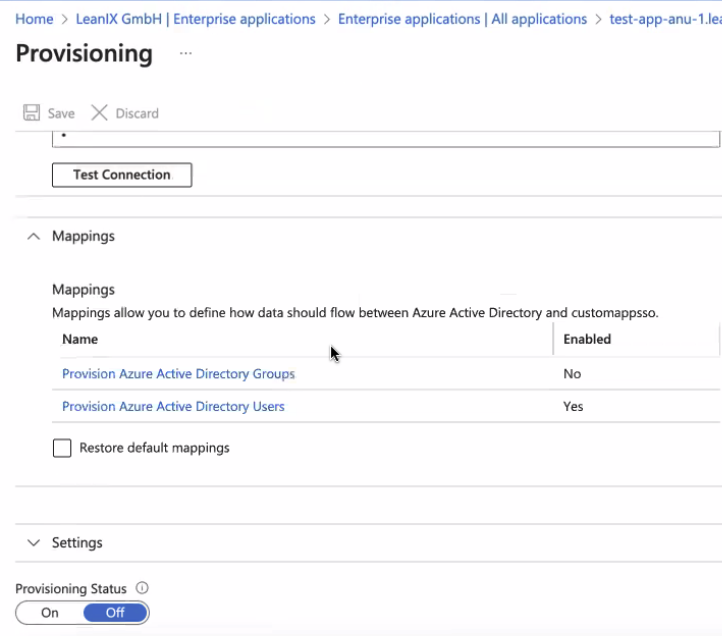
- Ensure that the provisioning of AD Groups is disabled.
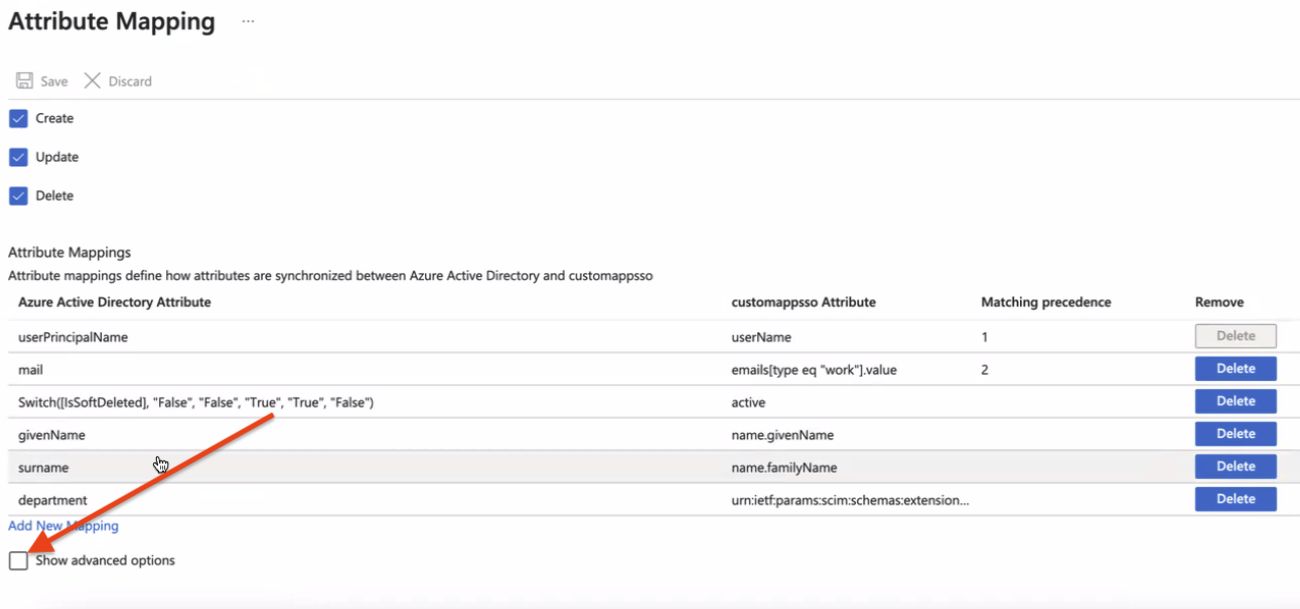
- Update attribute mapping to include only userPrincipalName, mail, Switch, givenName, surname, and department and delete all the others.
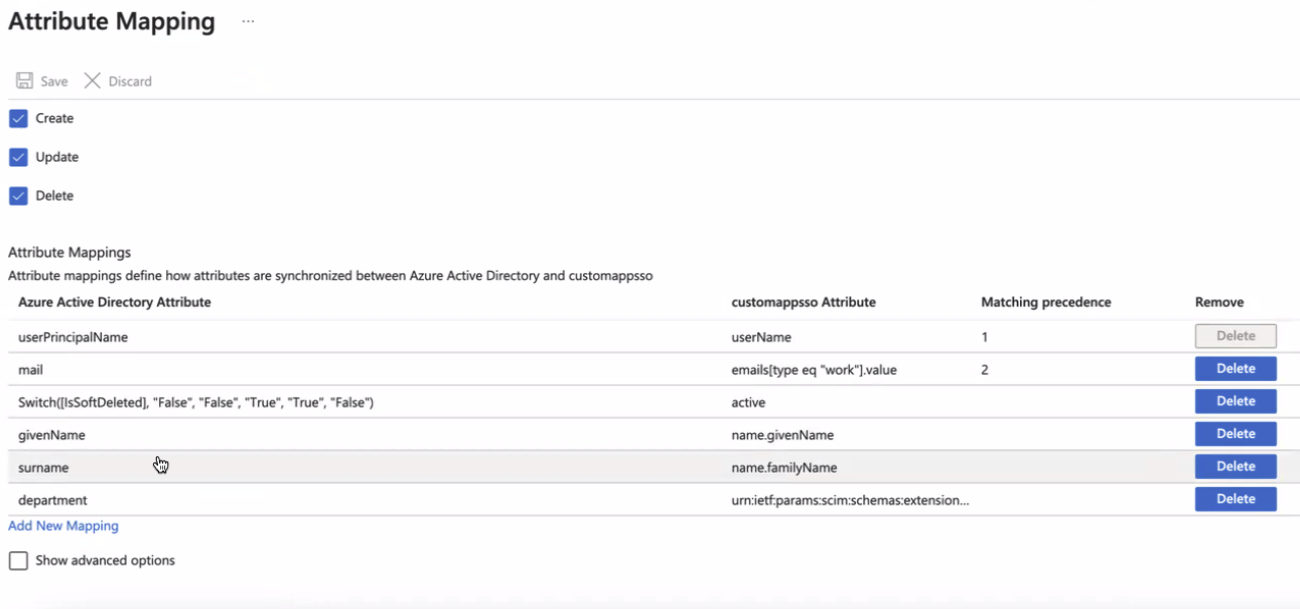
All required mapping values between Entra ID and LeanIX
To make Entra ID completely compatible with the SCIM implementation, the predefined email attribute must be configured as a matching attribute with matching precedence 2.
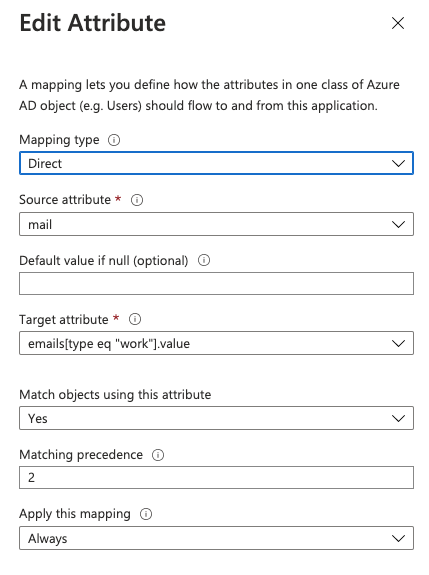
Email mapping as a secondary matching attribute
To learn more about matching attributes in Microsoft Entra ID, please refer to their documentation here. To learn more about how to build a SCIM endpoint and integrate it with the Microsoft Entra provisioning service, please refer to their documentation here.
- Test the provisioning by selecting Provision on demand and provisioning a test user.
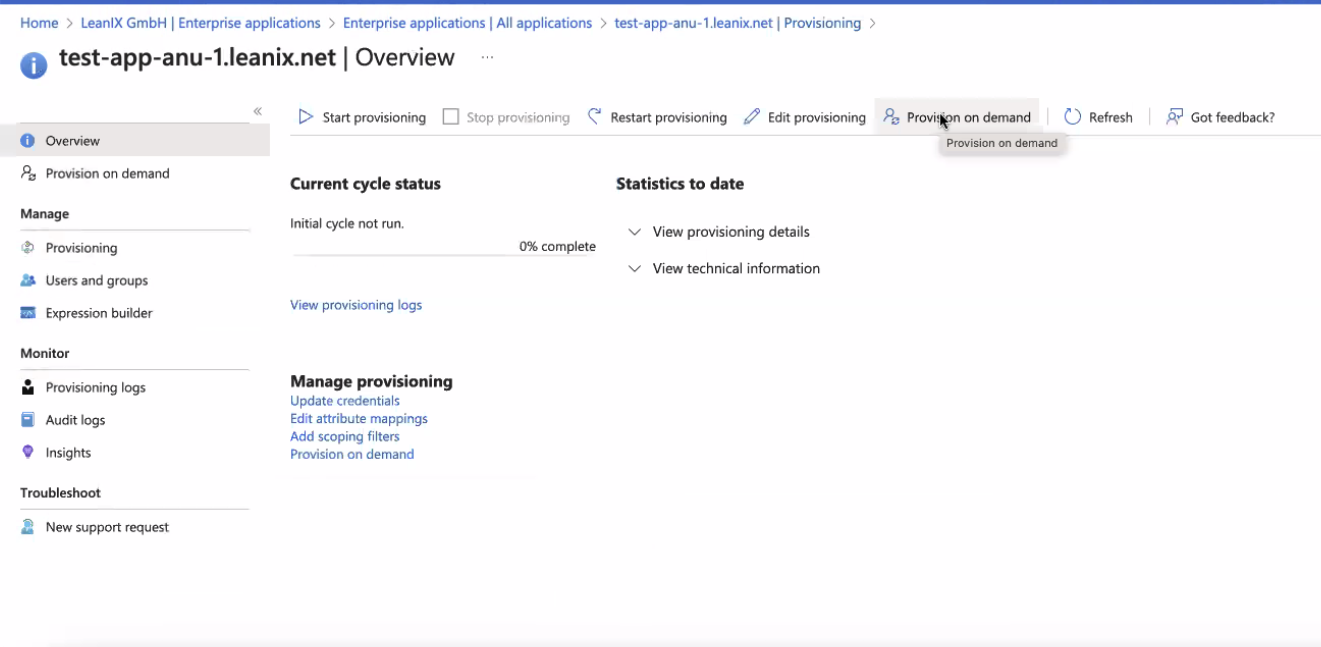
- Once the test user is provisioned successfully, click Start provisioning.
Step 3: Configure Externally Managed Roles
For customers who are managing their roles in Entra ID, a new attribute will have to be created and mapped for the role property.
- Check the box to Show Advanced Options on the Attribute Mapping page and then Edit attribute list.
- Enter the shown information for role.
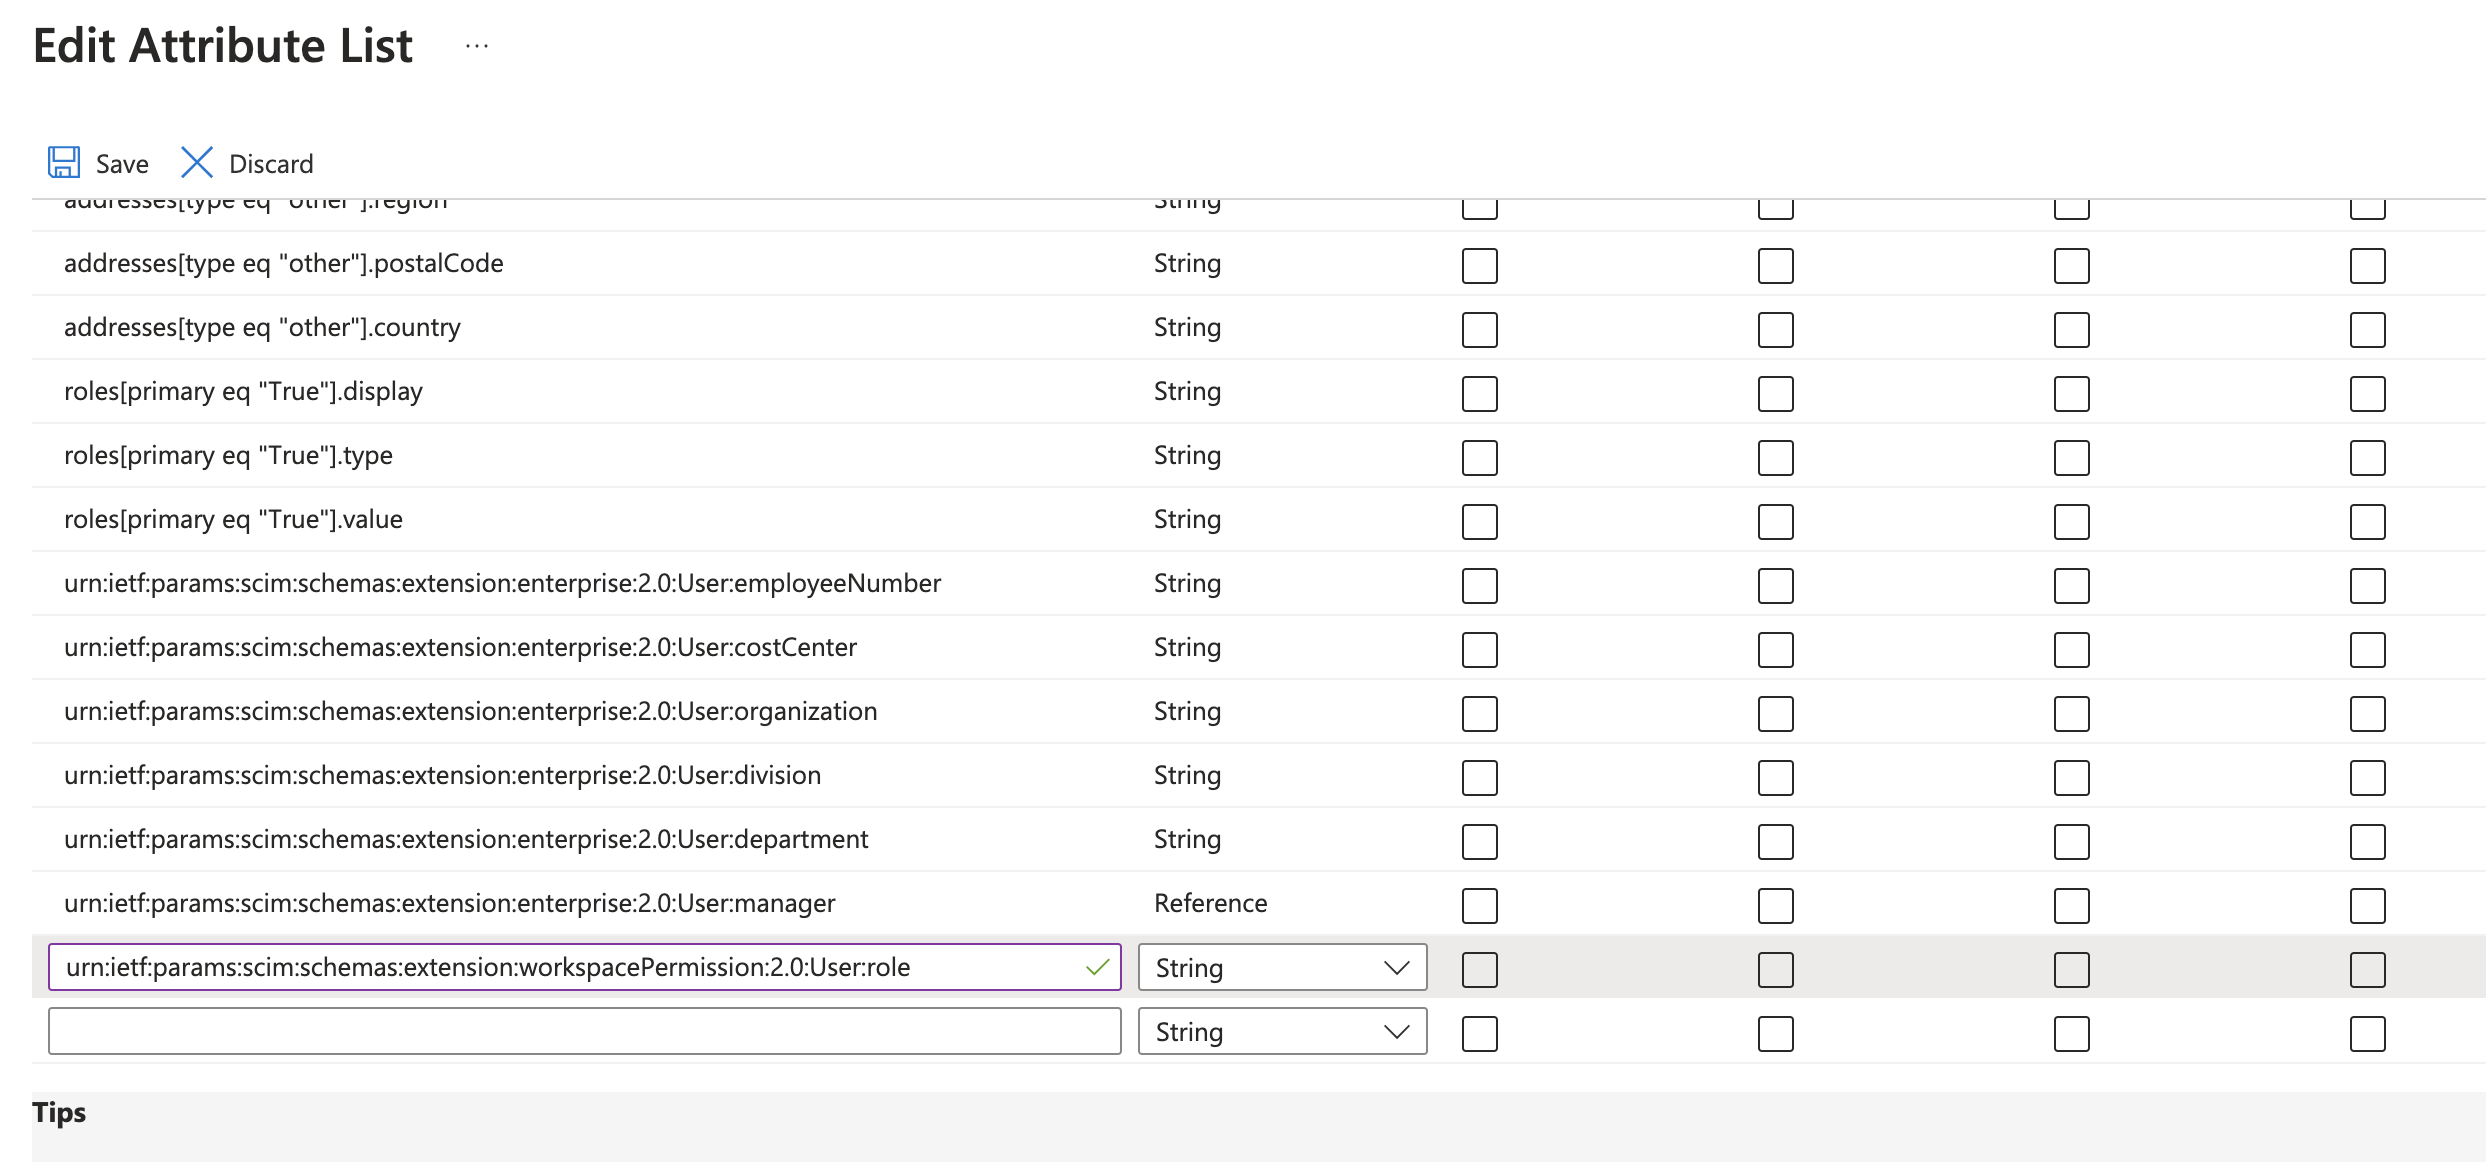
To map role attribute, enter urn:ietf:params:scim:schemas:extension:workspacePermission:2.0:User:role
- Now, you will add a new mapping with the following expression:
![IIF(Instr([appRoleAssignments], "ADMIN", "", "")>"0", "ADMIN", IIF(Instr([appRoleAssignments], "MEMBER", "", "")>"0", "MEMBER", IIF(Instr([appRoleAssignments], "VIEWER", "", "")>"0", "VIEWER", "")))](https://files.readme.io/f8cbd45-image.png)
IIF(Instr([appRoleAssignments], "ADMIN", "", "")>"0", "ADMIN", IIF(Instr([appRoleAssignments], "MEMBER", "", "")>"0", "MEMBER", IIF(Instr([appRoleAssignments], "VIEWER", "", "")>"0", "VIEWER", "")))
Updated 3 months ago