SCIM Setup in Okta
This page offers information on how to set up and configure SCIM in your Okta environment for seamless identity management.
Step 1: Retrieve the Bearer Token
For general guidance on configuring SCIM and retrieving short-term and long-term bearer tokens, see Steps to set up SCIM. After completing those steps, proceed to the next section, which provides detailed instructions for configuring your Okta environment for provisioning
Step 2: Configure Provisioning in Okta
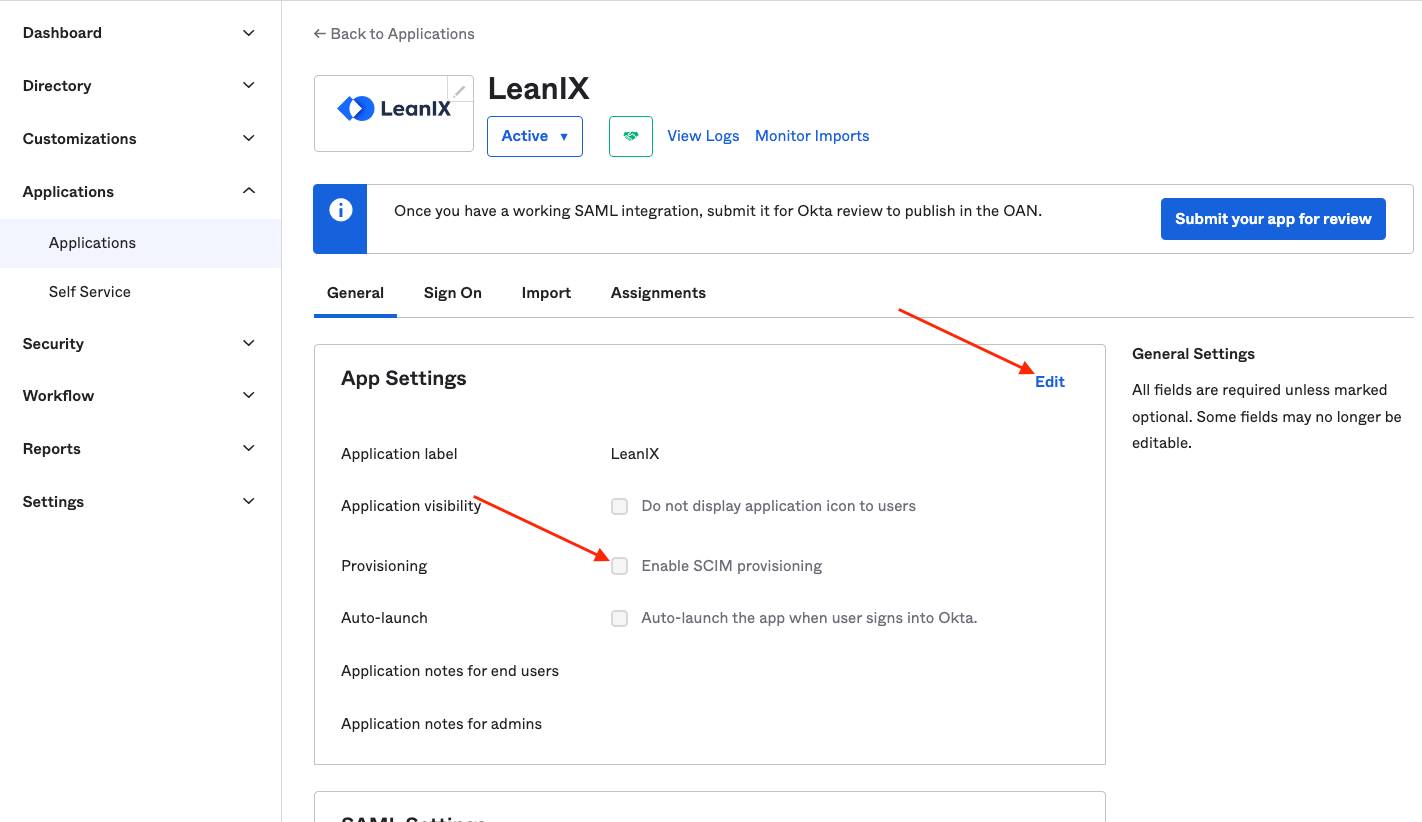
- Enable SCIM provisioning in the general tab of your LeanIX application.
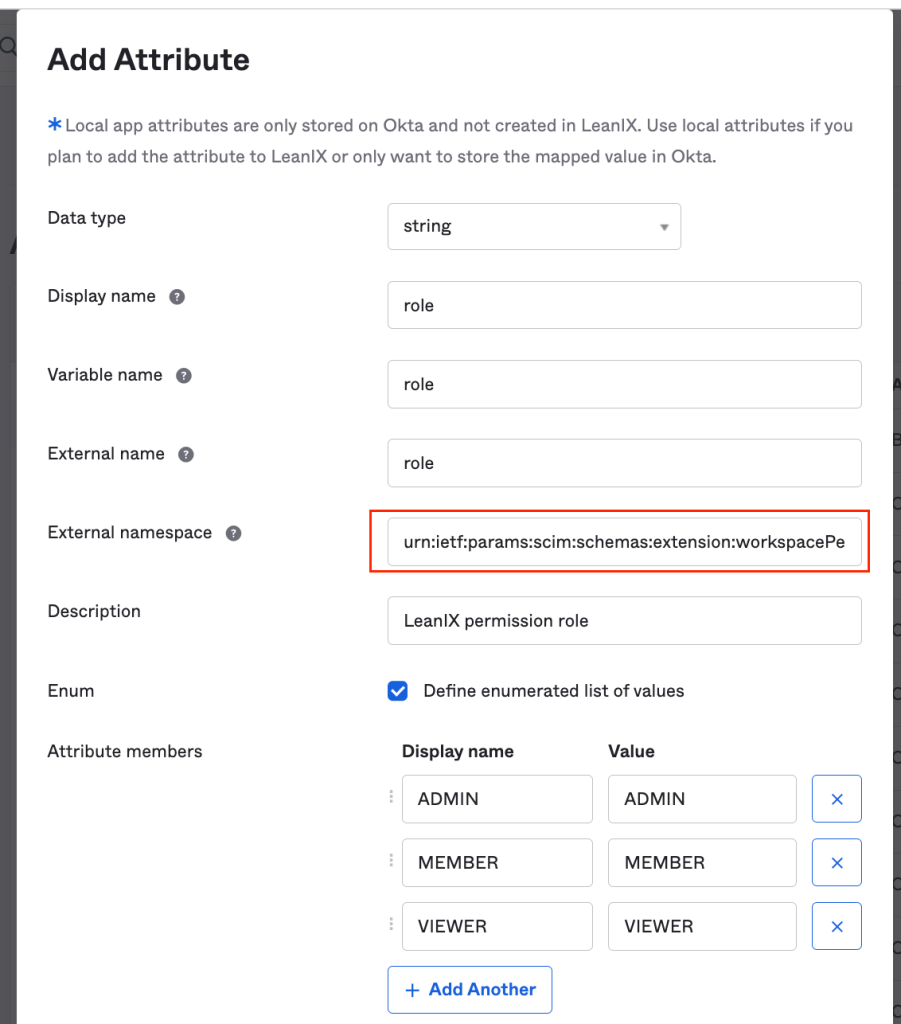
- If you have previously created the 'role' attribute, please delete it and then recreate it with the following external namespace. Save to confirm the changes:
urn:ietf:params:scim:schemas:extension:workspacePermission:2.0:User
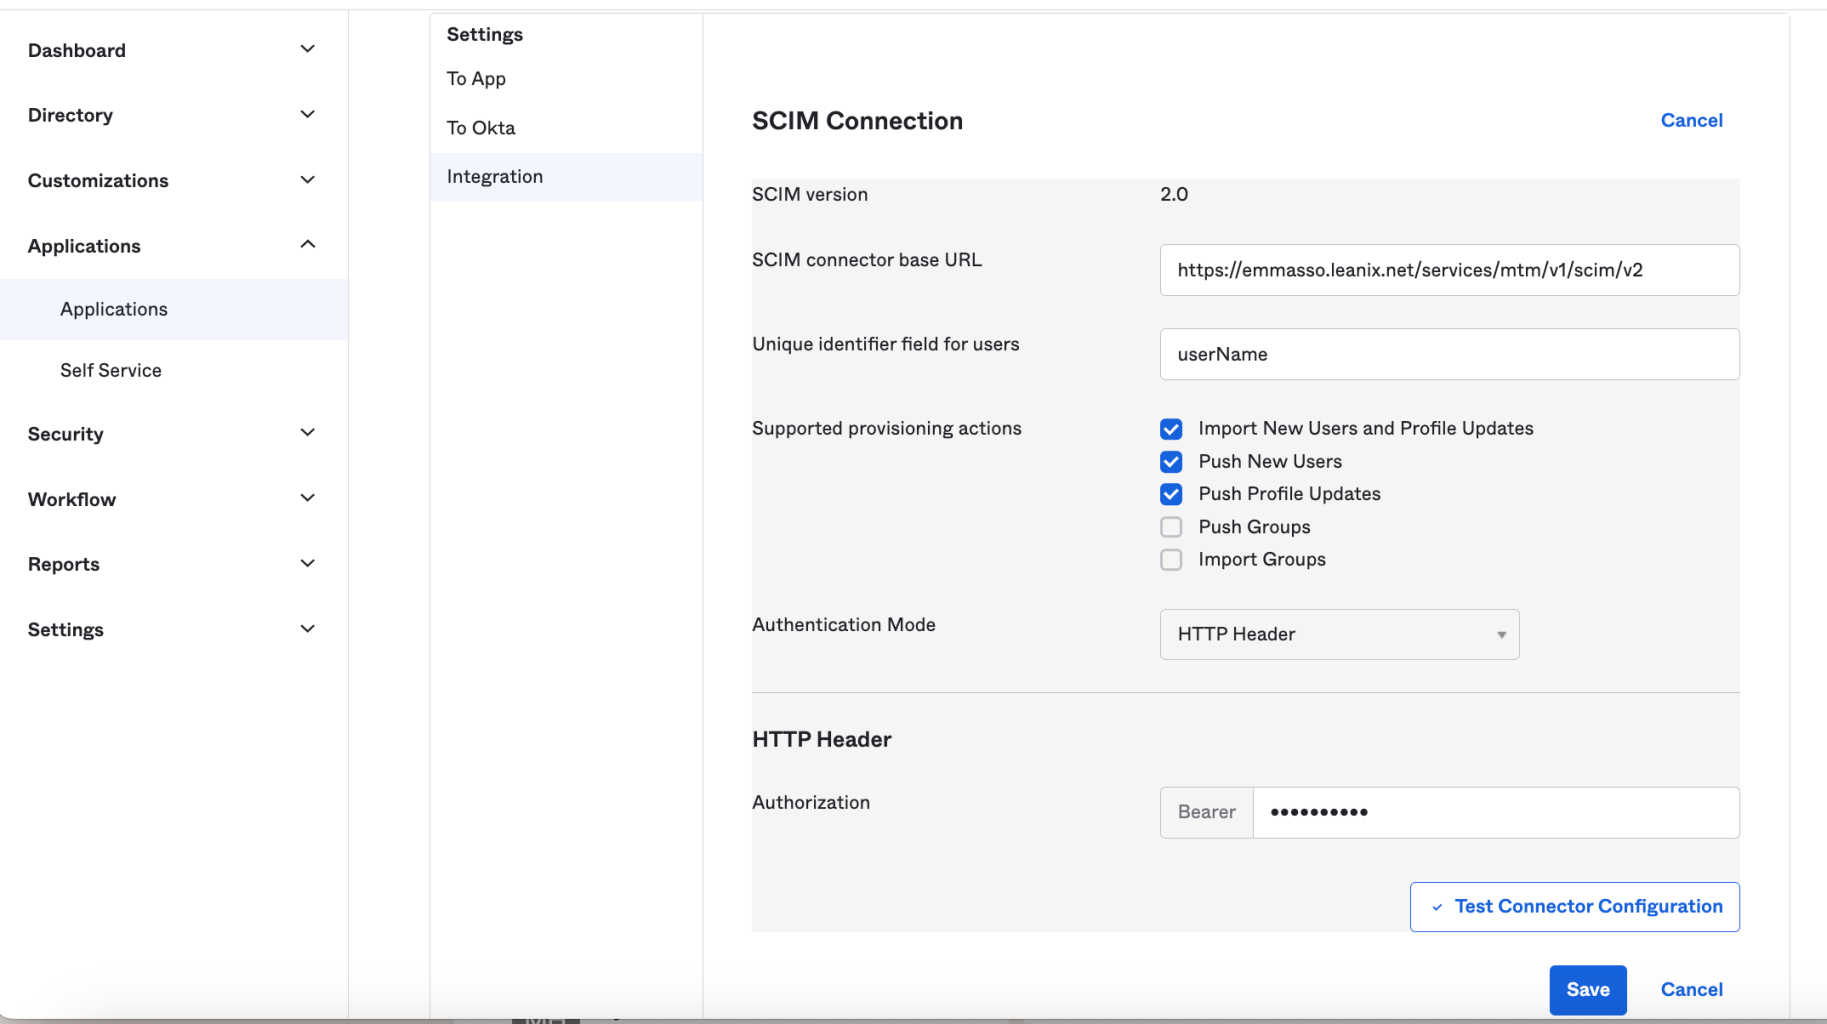
- Open the Provisioning tab and edit the SCIM Connection with the following information, then hit Save. The following screen is only for illustration, make sure to provide your domain.
| Field | Value |
|---|---|
| SCIM connector base URL | https://<customer_domain>.leanix.net/services/mtm/v1/scim/v2 |
| Unique identifier field for users | userName |
| Supported provisioning actions | Import New Users and Profile Updates, Push New Users, Push Profile Updates |
| Authentication Mode | HTTP Header |
| Bearer | Long-lived bearer token previously retrieved |
- Map your attributes
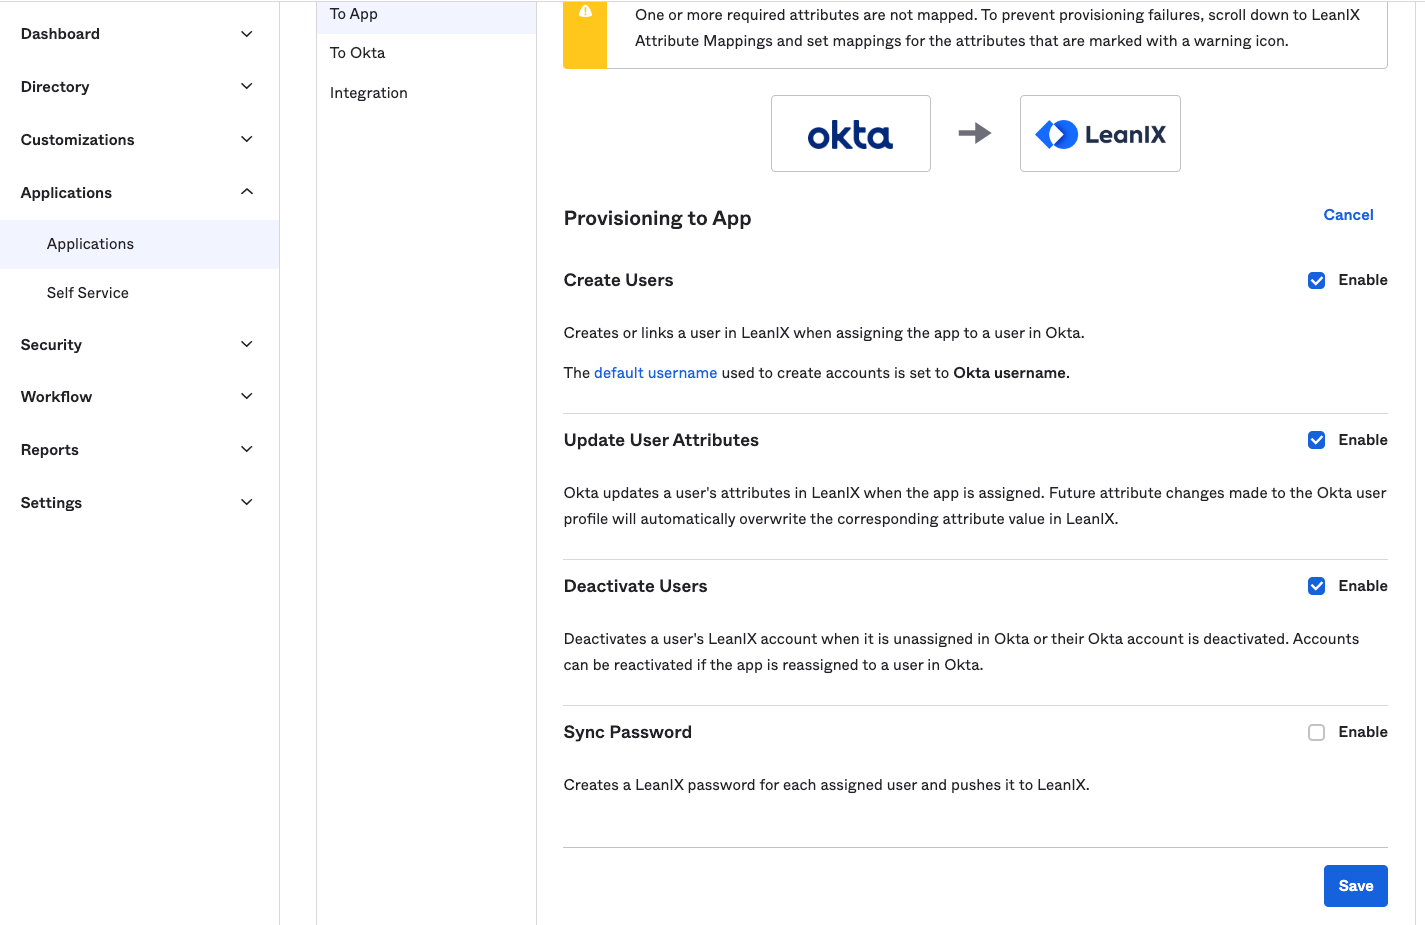
In the To App settings, enable the following and Save: Create users, Update user attributes, and Deactivate users.
Scroll down to LeanIX Attribute Mapping. Remove mapping for all attributes except for the following six:
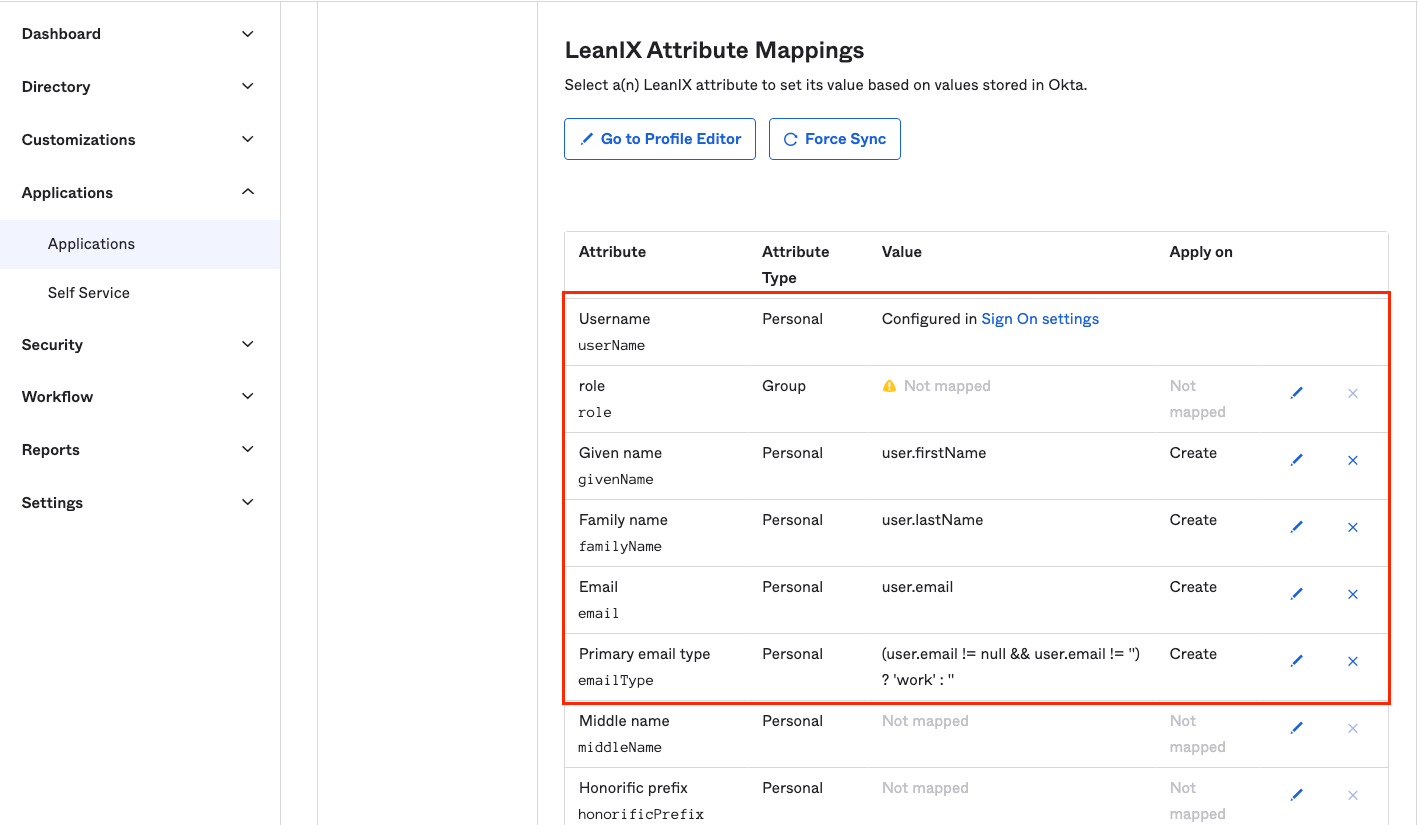
Note: The role property is only relevant for customers with fully-external IDM
Updated 4 months ago